
Outdoor accent lighting does more than illuminate a walkway, it shapes how a home looks after dark, highlights architectural details, and adds depth to landscaping. Done right, it can turn a flat facade into something that stands out on the block. Done poorly, it’s a string of spotlights aimed at nothing in particular. The difference comes down to fixture selection, placement strategy, and understanding what’s worth highlighting. Whether the goal is safety, curb appeal, or both, accent lighting offers a practical way to upgrade a home’s exterior without major renovation work.
Table of Contents
ToggleKey Takeaways
- Outdoor accent lighting transforms a flat home facade into an attractive focal point by highlighting architectural features, landscaping, and hardscape details with strategic fixture placement and layered lighting zones.
- Low-voltage (12V) systems are the ideal choice for DIY outdoor accent lighting projects, offering safety, ease of installation, and no permit requirements in most jurisdictions compared to line-voltage alternatives.
- Proper fixture selection—including cast aluminum or brass materials, IP65+ water ratings, and warm white LEDs (2700–3000K)—directly impacts both the aesthetic appeal and longevity of outdoor accent lighting.
- Avoid common placement mistakes like positioning fixtures too close to walls, overlighting small plants, or creating symmetrical overkill; instead, focus on one focal point and build outward with alternating accents.
- Successfully installing outdoor accent lighting requires planning cable runs, sizing transformers to total fixture wattage plus 20%, testing connections before burial, and making post-installation adjustments for optimal brightness and angle.
What Is Outdoor Accent Lighting and Why Does It Matter?
Outdoor accent lighting refers to fixtures specifically positioned to highlight architectural features, landscaping elements, or hardscape details, as opposed to general flood lighting or pathway illumination. Think of it as the difference between turning on every light in a room versus using a table lamp to draw attention to a piece of art.
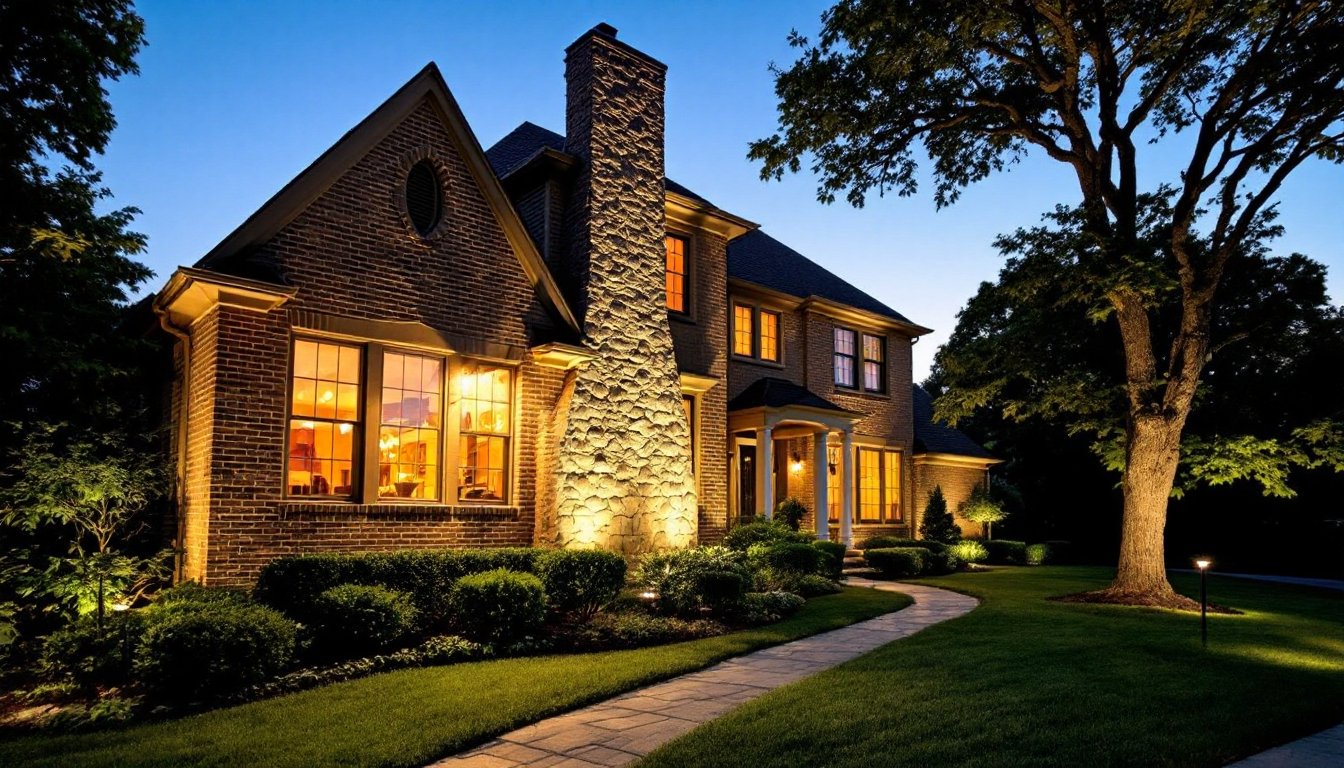
The primary purposes are visual interest and dimensionality. Most homes look flat under standard porch lights. Accent lighting adds layers by creating contrast between lit and unlit surfaces, emphasizing texture in brick or stone, and casting shadows that give depth to columns, eaves, or siding profiles.
From a practical standpoint, it also improves safety. Well-placed accent lights reduce dark corners around entries, garages, and side yards without the harsh glare of motion-sensor floods. And for resale value, exterior lighting ranks high on buyer appeal, it’s one of the few upgrades that’s immediately visible from the curb and requires no interior access to appreciate.
Most jurisdictions don’t require permits for low-voltage landscape lighting (12V systems), but if tapping into household circuits or adding new outdoor receptacles, check local codes. Standard 120V outdoor wiring falls under NEC Article 210 for branch circuits and requires GFCI protection.
Types of Outdoor Accent Lighting to Consider
Not all accent fixtures do the same job. Matching the light type to the feature being highlighted makes the difference between intentional design and random spotlighting.
Uplighting for Architectural Features
Uplighting places the fixture at ground level, aimed upward. It’s the go-to technique for columns, stone facades, chimneys, and anything vertical that benefits from dramatic shadow play. Bullet-style fixtures or well lights (recessed into the ground) work best here.
For textured surfaces, stacked stone, board-and-batten siding, or stucco, position the fixture 12 to 18 inches from the wall to graze the surface and emphasize the texture. For smooth surfaces like painted brick or siding, pull the fixture back 24 to 36 inches to avoid creating hot spots.
Use narrow beam angles (15–25 degrees) for tall, narrow features like columns. Wider beams (35–60 degrees) suit broader walls or entryways. Avoid placing uplights directly under eaves or overhangs unless the goal is to light the soffit itself, otherwise, the beam just hits the underside and stops.
Spotlights and Downlights for Trees and Landscaping
Spotlights work for medium-distance targets: mature trees, large shrubs, or specimen plants. They’re typically mounted on stakes and adjustable, which makes them forgiving during installation. Aim for the canopy or trunk, not the ground around the base.
Downlights, often called tree-mounted fixtures or hardscape lights, install higher up, on tree branches, pergola beams, or under deck railings, and cast light downward. This creates a moonlighting effect, with dappled shadows filtering through leaves. It’s subtler than uplighting and works well for patios or seating areas.
For trees, a single uplight at the base highlights the trunk. Pair it with a downlight in the canopy if the goal is to light the ground below. For shrubs and garden beds, use path lights with shields or hooded fixtures to direct light downward without spill.
Where to Place Accent Lights for Maximum Impact
Placement matters more than fixture count. Three well-positioned lights will outperform a dozen scattered randomly.
Start with the focal point, the feature a visitor notices first when pulling up. This might be the front door, a stone chimney, or a prominent gable. Light that element first, then build outward.
Layering is the next principle. Combine uplighting on the house with downlighting from a tree or pergola. Add a path light or two near the driveway or walkway edge. The goal is to create multiple zones of light at different heights, which adds depth and prevents the “spotlight on a blank wall” effect.
Avoid symmetrical overkill. Lighting every column, every window, and every shrub creates visual clutter. Instead, light alternating features or use one strong anchor (like an uplit entry) with softer accents elsewhere.
Common placement mistakes:
- Fixtures too close to walls, creating glare instead of wash
- Uplights aimed at windows, which just reflect light back and expose interiors
- Spotlights on small plants that don’t have enough mass to justify the attention
- Overcrowding the front yard while leaving side yards and backyard entries completely dark
Many landscape designers recommend treating the broader outdoor living space as a cohesive design element, where lighting extends beyond the front facade. This approach has become a hallmark of thoughtful home design trends in recent years.
How to Choose the Right Fixtures and Bulbs
Fixture selection starts with voltage. Low-voltage systems (12V) are the standard for DIY landscape lighting. They’re safer to install, easier to troubleshoot, and don’t require conduit burial in most jurisdictions. A transformer steps down household 120V to 12V, and the wiring runs above ground (though burying it 2–4 inches is recommended for longevity).
Line-voltage systems (120V) are more powerful and better for large properties or commercial-grade applications, but they require buried conduit, GFCI outlets, and often a permit. Unless lighting a large estate or dealing with long wire runs (over 100 feet), low-voltage is the more practical choice.
For fixture materials, look for cast aluminum, brass, or copper, not plastic. Plastic housings crack in freeze-thaw cycles and fade under UV. Brass and copper develop a patina over time, which some prefer aesthetically. Powder-coated aluminum resists corrosion and stays neutral in appearance.
IP ratings indicate water and dust resistance. Outdoor fixtures should be rated at least IP65 (dust-tight, protected against water jets). Anything recessed into the ground or exposed to sprinkler systems should be IP67 or higher.
For bulbs, LED is the default in 2026. Incandescent and halogen options are still available but burn hotter, draw more power, and require frequent replacement. LED fixtures pull 3–7 watts per bulb, compared to 20–50 watts for halogen equivalents.
Color temperature matters for aesthetics. Warm white (2700–3000K) suits traditional homes, brick, and wood. Neutral white (3500–4000K) works for modern architecture and gray or white siding. Cool white (5000K+) looks clinical and is rarely appropriate for residential accent lighting.
Lumens determine brightness. For uplighting a two-story facade, aim for 300–500 lumens per fixture. For path lights or subtle accents, 50–150 lumens is sufficient. Overlighting is a common mistake, it’s easier to add fixtures later than to dial back glare.
DIY Installation Tips for Outdoor Accent Lighting
Low-voltage lighting is DIY-friendly, but it’s not plug-and-play. Proper installation prevents voltage drop, ensures even brightness, and extends fixture life.
Step 1: Plan the layout on paper. Sketch the property, mark fixture locations, and measure cable runs from the transformer. Most transformers support 100–150 feet of wire per run, but voltage drop increases with distance. For runs over 50 feet, consider a hub system or multiple transformer taps to maintain consistent brightness.
Step 2: Choose a transformer. Size it to handle the total wattage of all fixtures, plus 20% overhead. If the total load is 100 watts, use a 120-watt transformer minimum. Transformers mount near an outdoor GFCI outlet. Look for models with timers or photocells, manual switching defeats the purpose of accent lighting.
Step 3: Run the cable. Use 12- or 14-gauge landscape wire. Thicker wire (lower gauge number) reduces voltage drop. Lay it along the planned route before burying. Avoid sharp bends, which can damage insulation.
Step 4: Connect fixtures. Most low-voltage systems use quick-connect clips that pierce the cable jacket. Strip the wire ends, insert into the fixture lead, and tighten. Test each fixture before burying the cable, correcting a connection later means digging it up.
Step 5: Bury and mulch. Dig a shallow trench (2–4 inches) with a flat spade or edging tool. Lay the cable in the trench, backfill, and cover with mulch. Mark the cable path on your property plan, future landscaping or digging can sever it.
Safety notes:
- Always turn off power at the breaker before connecting the transformer
- Wear work gloves when handling metal fixtures and safety glasses when drilling or cutting
- Use a voltage tester to confirm the transformer output before connecting fixtures
- Keep cable connections dry during installation, moisture causes corrosion
Tools needed:
- Flat spade or trenching tool
- Wire strippers
- Voltage tester or multimeter
- Screwdriver (for transformer wiring)
- Measuring tape
- Stakes or flags (to mark fixture locations)
Common mistakes to avoid:
- Daisy-chaining too many fixtures on a single run (causes dim lights at the end)
- Using twist-on wire connectors instead of waterproof quick-connects
- Skipping the voltage test before burying cable
- Placing transformers in unventilated enclosures (they generate heat)
For homeowners considering a broader approach to exterior ambiance, integrating mood lighting principles into the design can create a more cohesive transition between indoor and outdoor spaces.
Adjustments and tweaks are normal. After the first night, walk the property and note what’s too bright, too dim, or aimed wrong. Low-voltage fixtures are easy to reposition, loosen the stake, adjust the angle, and tighten. Getting it right takes iteration, not perfection on the first try.


