
Harbor Breeze landscape lighting has become a go-to choice for homeowners looking to enhance curb appeal, improve nighttime safety, and extend outdoor living hours without very costly. Sold primarily through Lowe’s, these fixtures offer reliable low-voltage illumination with straightforward installation, ideal for DIYers who want professional-looking results. Whether you’re lighting a garden path, highlighting architectural features, or adding ambiance to a patio, understanding what Harbor Breeze offers and how to install it properly makes the difference between a weekend project and a costly redo.
Table of Contents
ToggleKey Takeaways
- Harbor Breeze landscape lighting offers affordable, DIY-friendly 12-volt low-voltage systems that enhance curb appeal and outdoor safety without professional installation costs.
- LED fixtures consume 3–5W per fixture compared to 20W for halogen bulbs, allowing a single 100W transformer to power 20+ path lights while lasting 25,000–50,000 hours.
- Proper installation requires planning cable runs, burying wire at least 6 inches deep, testing voltage before backfilling, and avoiding wire connections prone to corrosion through the use of dielectric grease and heat-shrink tubing.
- Harbor Breeze’s modular design lets you start with a $80–$150 starter kit and expand with individual fixtures ($10–$30 each) as budget allows, making landscape lighting accessible for homeowners.
- Annual fixture cleaning, regular connection inspections, and maintaining 6-inch vegetation clearance prevent voltage drop, corrosion, and premature light failure in Harbor Breeze systems.
- Layering different fixture types—path lights for safety, spotlights for drama, and well lights for subtle accents—creates a dimensional nighttime landscape that transforms outdoor spaces.
What Is Harbor Breeze Landscape Lighting?
Harbor Breeze is a house brand manufactured for Lowe’s, covering ceiling fans, outdoor lighting, and low-voltage landscape lighting kits. The landscape lighting line consists of LED and halogen fixtures designed for residential outdoor use, operating on a 12-volt AC transformer system.
Most kits include a transformer (typically 45W to 200W capacity), cable (14- or 16-gauge direct-burial wire), fixtures, and connectors. The fixtures themselves range from path lights and spotlights to well lights and accent fixtures, all constructed with weather-resistant materials like powder-coated aluminum, plastic, or stainless steel.
These systems are Class 2 low-voltage, meaning they’re safer to install than 120V line-voltage systems and typically don’t require a permit in most jurisdictions, though you should always verify local codes. The low voltage reduces shock risk and allows for simpler DIY installation without an electrician’s license.
Key Features and Benefits
Harbor Breeze landscape lighting delivers several practical advantages for homeowners tackling outdoor projects:
Energy efficiency: LED options consume 3W to 5W per fixture, compared to 20W for older halogen bulbs. A 100W transformer can power 20+ LED path lights versus only five halogens. Expect LED fixtures to last 25,000 to 50,000 hours before replacement.
Modular expandability: Start with a small kit and add fixtures as budget allows. Most transformers have multiple taps (common, 12V, 13V, 14V, 15V) to compensate for voltage drop over long cable runs, critical when you’re stretching wire 100+ feet from the transformer.
Weather resistance: Fixtures carry IP65 or IP67 ratings, meaning they’re dust-tight and protected against water jets or temporary immersion. Powder-coated finishes resist rust better than bare aluminum, especially in coastal or high-humidity climates.
Integrated timers and photocells: Many transformers include built-in dusk-to-dawn sensors and digital timers. This eliminates the need for separate smart plugs or manual switching, your lights turn on at sunset and off at a preset time, saving energy without daily fuss.
Affordability: Starter kits (transformer plus 6-8 fixtures) run $80 to $150 at typical retail, with individual fixtures priced $10 to $30 depending on style and lumen output. That’s competitive with big-box alternatives and significantly cheaper than hiring a landscape lighting installer.
Popular Harbor Breeze Landscape Lighting Options
Harbor Breeze’s catalog covers most residential lighting needs, though availability shifts with product cycles. Here’s what you’ll commonly find:
Path Lights and Spotlights
Path lights (also called walkway or bollard lights) stand 12 to 24 inches tall and cast downward or 360-degree light. Look for fixtures with integrated LED modules rather than replaceable bulbs, they’re more reliable and weatherproof. Spacing path lights 8 to 10 feet apart provides even illumination without harsh gaps.
Spotlights feature adjustable heads and 20- to 40-degree beam angles, ideal for uplighting trees, flagpoles, or siding. Many include ground stakes and swivel mounts. For tree uplighting, position the fixture 2 to 3 feet from the trunk and angle it 30-45 degrees, too close creates harsh shadows, too far wastes light.
Well lights recess into the ground or hardscape, sitting flush with the surface. They’re excellent for illuminating under eaves or washing walls with light. Installation requires digging a cavity and ensuring proper drainage, standing water will corrode connections and shorten fixture life.
Deck and step lights mount horizontally into risers or post caps. These improve safety on stairs and elevated decks while adding subtle accent lighting. Wire routing can be tricky: plan the cable path before cutting deck boards.
Installation Guide for DIY Homeowners
Installing Harbor Breeze landscape lighting is a manageable weekend project if you follow proper procedures. Skipping steps, especially layout planning and wire burial, leads to voltage issues and code violations.
1. Plan the layout: Walk your yard at dusk and mark fixture locations with flags or spray paint. Count fixtures and measure cable runs. The maximum run length depends on wire gauge and total wattage: 14-gauge wire supports up to 150W over 100 feet: 16-gauge handles 100W over the same distance. Exceeding these limits causes voltage drop, dimming fixtures farthest from the transformer.
2. Mount the transformer: Install it near a GFCI-protected outdoor outlet, ideally under an eave or in a weather-resistant box. The transformer should be at least 12 inches above grade to prevent water infiltration. Most units have keyhole mounts for easy wall attachment.
3. Trench the cable: Bury low-voltage wire at least 6 inches deep per NEC guidelines (some jurisdictions require 12 inches, check local code). Use a flat spade or trenching tool. Avoid sharp bends: they stress the insulation. If crossing driveways or high-traffic areas, run cable through schedule 40 PVC conduit for protection.
4. Connect fixtures: Harbor Breeze kits typically use quick-connect hubs or piercing connectors. Piercing connectors puncture the main cable without stripping, convenient but prone to corrosion if not filled with dielectric grease. For a more reliable connection, cut the cable, strip 1/2 inch of insulation, and use waterproof wire nuts with heat-shrink tubing.
5. Test before burying: Plug in the transformer and verify every fixture lights up. Measure voltage at the last fixture with a multimeter, it should read 10.8V to 12V. Below 10.5V indicates excessive voltage drop: you’ll need heavier-gauge wire or a second transformer run.
6. Backfill and adjust: Once everything works, backfill trenches and tamp soil firmly. Aim fixtures, tighten set screws, and program the timer. Most transformers default to a 6-hour runtime: adjust based on your schedule.
Safety gear: Wear gloves when handling wire and fixtures, and safety glasses if cutting or drilling. If using power tools for trenching, add hearing protection.
Permit note: Low-voltage landscape lighting rarely requires a permit, but some municipalities regulate transformer installation or connection to outdoor outlets. A quick call to your local building department clarifies requirements.
Maintenance and Troubleshooting Tips
Landscape lighting is low-maintenance, but neglecting it leads to dim lights, corrosion, and early failures.
Clean fixtures annually: Dirt, pollen, and oxidation reduce light output. Wipe lenses with a damp cloth and mild detergent. For stubborn corrosion on aluminum fixtures, use a paste of baking soda and water, then rinse and dry thoroughly.
Inspect connections: Check wire splices and quick-connects every 12-18 months. Moisture intrusion causes green corrosion (copper oxide). If connections look corroded, cut them out, strip fresh wire, and remake the splice with dielectric grease and heat-shrink tubing.
Address voltage drop: If lights dim over time, measure voltage at the transformer and at the farthest fixture. A drop greater than 1.5V indicates resistance, likely from corroded connections or undersized wire. Solutions include adding a second transformer run, upgrading to 12-gauge wire, or using the higher voltage taps on your transformer.
Replace failed LEDs: Integrated LED fixtures can’t have bulbs swapped. When they fail (rare before 20,000 hours), replace the entire fixture. Before tossing it, test the connection, sometimes the issue is a bad splice, not a dead LED.
Trim vegetation: Overgrown plants block light and trap moisture against fixtures. Keep a 6-inch clearance around path lights and spotlights. For in-ground well lights, ensure mulch or soil doesn’t cover the lens.
Winter prep: In freezing climates, disconnect and drain transformers if you’re shutting the system down seasonally. Water in the transformer housing can freeze and crack internal components. Leave fixtures in place, they’re built to handle freeze-thaw cycles.
Design Ideas for Your Outdoor Space
Effective landscape lighting balances function, safety, and aesthetics. Here’s how to apply Harbor Breeze fixtures in common scenarios:
Pathways and walkways: Space path lights 8 to 10 feet apart along both sides of a walkway for even coverage. For curved paths, stagger lights on alternating sides to guide the eye. Choose fixtures with downward-facing shields to minimize glare and light trespass into neighbors’ yards.
Architectural accents: Uplight columns, siding textures, or stonework with adjustable spotlights. Position fixtures 2 to 4 feet from the wall and angle them 30-45 degrees. Warm white LEDs (2700K to 3000K) complement brick and wood: cooler tones (4000K) suit modern metal or concrete.
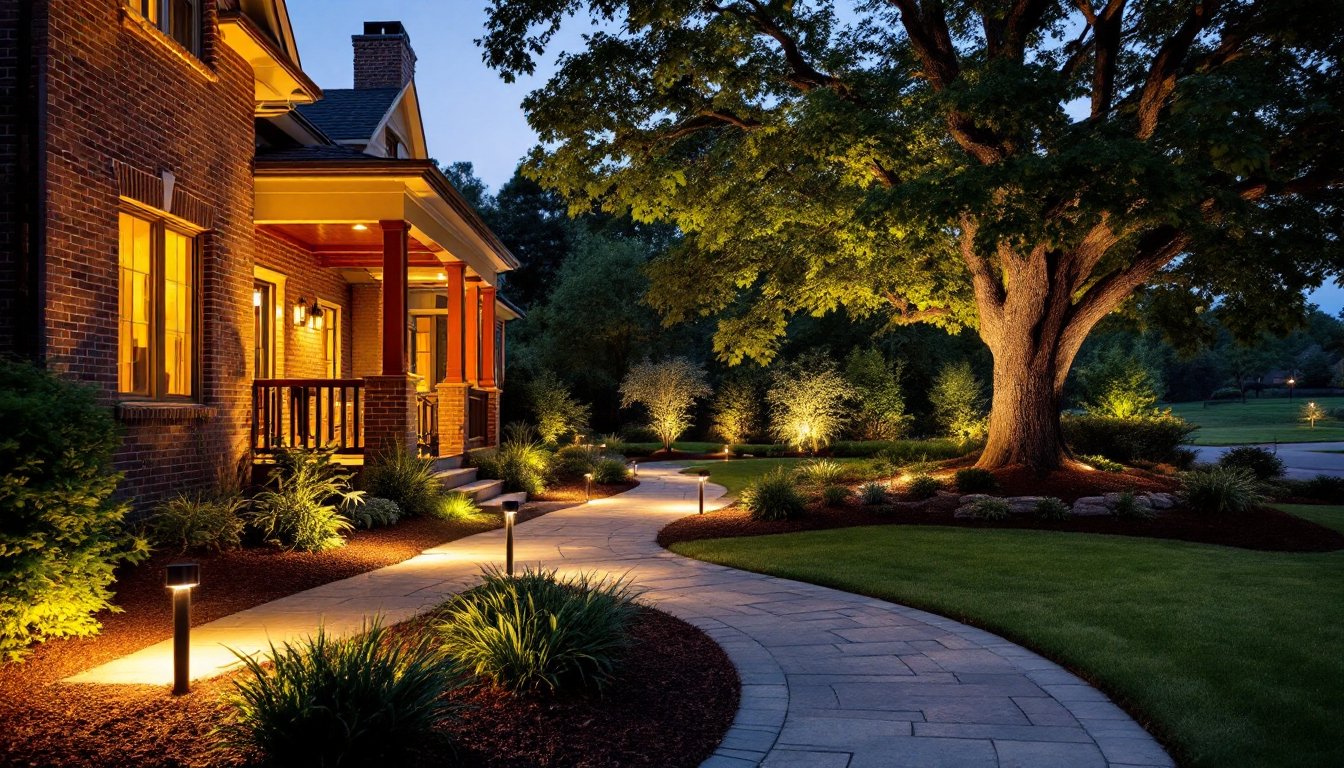
Trees and plantings: Uplight deciduous trees from the base to highlight branch structure. For dense evergreens, place lights 3 to 5 feet away to avoid a flat, washed-out look. Many outdoor lighting designs layer multiple fixture types, path lights for safety, spotlights for drama, and well lights for subtle ground-level glow.
Decks and patios: Mount step lights in riser faces or under cap rails for code-compliant safety lighting. Combine with post-cap fixtures or string lights (separate from your low-voltage system) for ambient entertaining light. Incorporating smart home technology like Wi-Fi-enabled transformers or Zigbee dimmers lets you control brightness and schedules from your phone.
Water features: Highlight fountains or ponds with submersible or landscape spotlights. Ensure any fixture near water is rated IP68 (submersible) or positioned to avoid direct spray. GFCI protection is mandatory for any lighting within 5 feet of water.
Color temperature consistency: Stick to one color temperature across your entire system, mixing warm and cool white creates a disjointed look. For comprehensive guidance on planning layouts and selecting fixtures, landscape lighting resources offer photos and tutorials that help visualize finished projects before you dig the first trench.
Layering different fixture types at varying heights creates depth and visual interest, transforming a flat yard into a dimensional nighttime landscape.


