
Good kitchen lighting isn’t just about seeing what you’re chopping, it’s about creating a space that works as hard as you do. In 2026, modern kitchen lighting blends function with style, offering solutions that go far beyond the single overhead fixture your grandparents relied on. Whether someone’s renovating a cramped galley kitchen or upgrading a spacious open-plan cook space, the right lighting strategy transforms how the room feels and performs. This guide walks through practical, contemporary lighting approaches that homeowners can carry out themselves, from layered fixture planning to smart controls that adjust with a voice command.
Table of Contents
ToggleKey Takeaways
- Modern kitchen lighting relies on three intentional layers—ambient, task, and accent—rather than a single overhead fixture, creating flexible spaces that adapt to cooking, dining, and entertaining needs.
- Under-cabinet LED lighting is the MVP of kitchen task lighting, eliminating shadows on countertops while offering dimmed mood lighting, with strip lights at 3000K-4000K color temperature providing both safety and aesthetics.
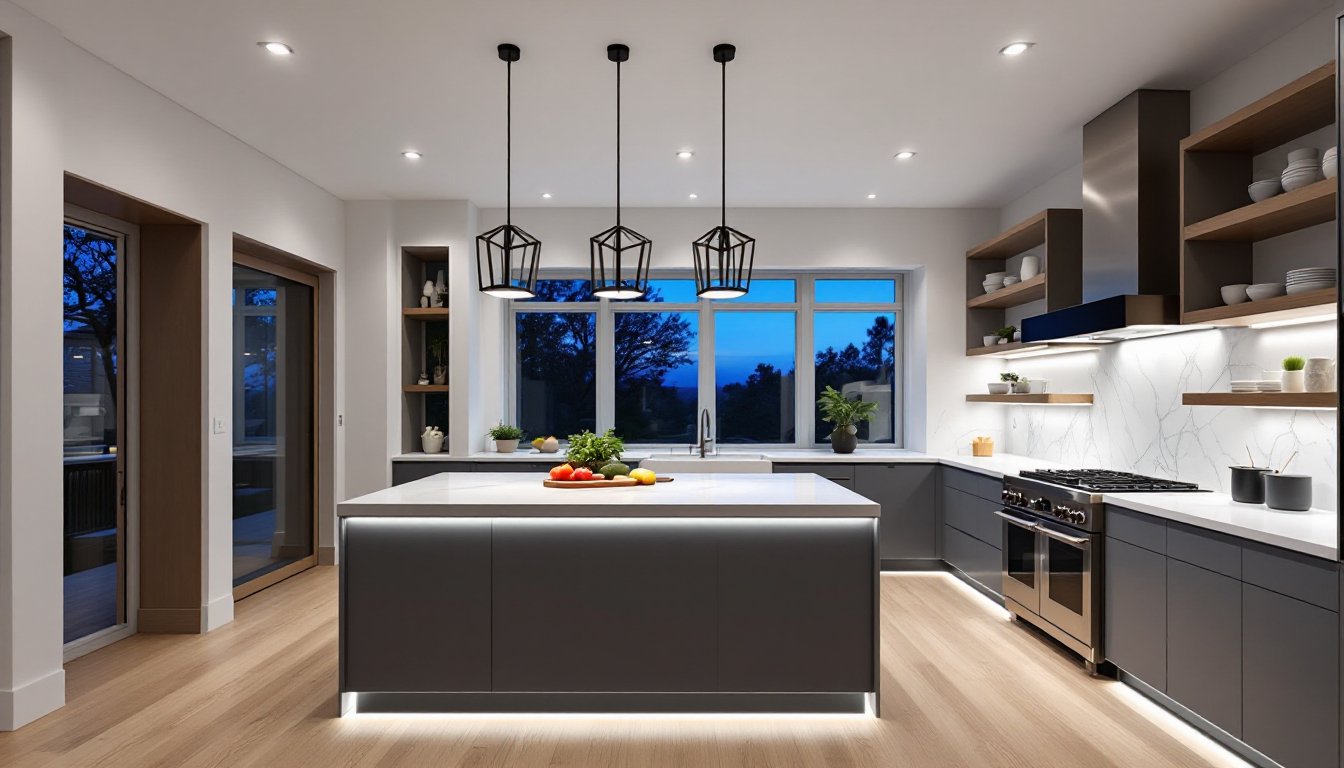
- Statement pendant lights over islands and countertops serve as functional workhorses and design focal points, requiring proper spacing (24-30 inches apart) and mounting height (30-36 inches above counters) for optimal task lighting and visual impact.
- Recessed and track lighting systems deliver sleek, minimalist appeal with modern LED retrofit kits allowing straightforward upgrades, while track systems offer repositionable flexibility for changing kitchen layouts and accent lighting needs.
- Smart lighting systems with voice commands and programmable schedules enable homeowners to adjust brightness and color temperature throughout the day, with many 2026 systems providing adaptive features that shift from cool energizing light to warm evening tones.
- LED technology has revolutionized kitchen lighting upgrades, running 25+ times longer than incandescent bulbs while consuming less power, making kitchen renovations more accessible and energy-efficient for DIY-oriented homeowners.
Why Modern Kitchen Lighting Matters
Kitchens demand more from their lighting than any other room in the house. A cook needs bright, shadow-free task lighting at the counter, but they also want warm ambient light for morning coffee and adjustable mood lighting when entertaining. Poor lighting creates eye strain, makes food prep dangerous (can’t see that knife edge clearly), and kills the vibe when guests gather around the island.
Modern lighting design addresses these needs through intentional layering and flexibility. A well-lit kitchen improves safety by eliminating dark corners and shadowed work zones. It enhances home value, potential buyers notice updated fixtures immediately. And it adapts to how people actually use the space, shifting from bright task mode during meal prep to softer ambient lighting for dining.
The shift toward LED technology has made upgrading more accessible than ever. LEDs run cooler, last 25,000+ hours (versus 1,000 for incandescent), and draw a fraction of the power. That means less heat in an already-warm cooking space and lower utility bills. Most modern fixtures come LED-ready or integrated, simplifying installation for DIYers comfortable with basic electrical work. Just remember: if the project involves adding new circuits or moving junction boxes, most jurisdictions require a permit and often a licensed electrician.
Layered Lighting: The Foundation of Modern Kitchen Design
The single-source overhead light is dead. Modern kitchens use three lighting layers: ambient, task, and accent. Each serves a distinct purpose, and together they create a flexible, high-functioning space.
Ambient lighting provides overall illumination, the base layer that fills the room. Recessed ceiling cans, flush-mount fixtures, or large pendants serve this role. Aim for roughly 5,000 to 10,000 total lumens in a standard 10×12 kitchen, but that varies with ceiling height and surface colors (darker cabinets absorb more light).
Task lighting focuses on work zones: countertops, sinks, ranges, and islands. Under-cabinet strips, pendant clusters, or dedicated track heads ensure cooks can see what they’re doing without casting shadows. Task fixtures should deliver 75 to 100 lumens per square foot in prep areas, according to Illuminating Engineering Society (IES) guidelines.
Accent lighting highlights architectural features, open shelving, or decorative elements. Think LED strips inside glass-front cabinets, toe-kick lighting, or directional mini-spots. Accent lights add depth and visual interest, especially in open-plan homes where the kitchen flows into living areas. Similar principles apply in commercial settings, where restaurant lighting balances function with atmosphere.
Layering doesn’t require a full gut renovation. Homeowners can start by adding under-cabinet LEDs and swapping out a dated ceiling fixture, then expand with dimmers and accent lights as budget allows. The key is planning circuits and switches upfront so each layer operates independently.
Statement Pendant Lights Over Islands and Counters
Pendant lights have become the jewelry of the modern kitchen, functional workhorses that double as design focal points. Hung over islands, peninsulas, or breakfast bars, they deliver concentrated task lighting while anchoring the room’s aesthetic.
Sizing and spacing matter. For a standard 36-inch-wide island, use two to three pendants spaced 24 to 30 inches apart. Hang the bottom of each fixture 30 to 36 inches above the counter surface, high enough to avoid head-bumps but low enough to light the work area effectively. Larger islands (60+ inches) can handle bigger statement pieces or more fixtures.
Materials and styles run the gamut in 2026. Geometric metal cages, hand-blown glass globes, concrete or wood accents, and minimalist drum shades all fit the modern design palette. According to trends highlighted by Homedit, mixed-material pendants, like matte black steel with brass accents, add visual complexity without clutter.
Installation tips: Most pendants mount to a standard junction box, but verify the box is rated for the fixture’s weight (some glass or concrete designs exceed typical 50-lb box limits). If the existing box is centered in the ceiling but the island isn’t, consider a swag hook or surface-mounted conduit to reposition the fixture, or hire an electrician to relocate the junction box and add a new circuit if needed.
For adjustable height, choose pendants with cord or chain suspension rather than fixed rods. This lets someone tweak the drop distance after installation, a handy option in homes with vaulted or unusually high ceilings.
Under-Cabinet LED Lighting for Task and Ambiance
Under-cabinet lighting is the MVP of kitchen task lighting. It eliminates shadows on countertops, making food prep safer and more precise, and when dimmed it doubles as subtle mood lighting for late-night snacking.
LED strip lights are the most popular choice. They’re thin, flexible, and energy-efficient, tucking neatly under wall cabinets. Look for strips rated at 3000K to 4000K color temperature, warm enough to feel inviting but bright enough for detailed work. High-CRI (color rendering index) LEDs, typically 90+ CRI, render food colors accurately, which matters when checking if that chicken is cooked through.
Puck lights (small, hockey-puck-sized fixtures) offer discrete pools of light but can create hot spots if spaced too far apart. Space them every 8 to 12 inches for even coverage. Integrated LED light bars provide the smoothest, most uniform illumination and often include built-in diffusers to eliminate harsh LED dots.
Installation approaches:
- Plug-in kits are the easiest DIY option, mount the fixtures, run a low-voltage cable to a transformer, and plug it into an existing outlet. No hardwiring required.
- Hardwired systems tie into the kitchen’s electrical circuit, operated by a wall switch. This requires basic electrical skills: turning off the circuit breaker, fishing cable through cabinets, making wire connections with twist-on connectors, and securing fixtures per the manufacturer’s instructions. Always test with a non-contact voltage tester before touching wires.
- Battery-powered strips work in rentals or spaces without accessible outlets, but expect to replace batteries every few months under regular use.
Run cables along the back edge of cabinets (against the wall) to keep them hidden. Use adhesive-backed cable clips or small staples to secure wiring, and seal any drilled holes with caulk to prevent pests.
Recessed and Track Lighting for Clean, Minimalist Appeal
For homeowners chasing a sleek, uncluttered look, recessed cans and track systems deliver powerful, adjustable lighting without visual bulk.
Recessed lighting (often called can lights or downlights) mounts flush with the ceiling. Modern LED retrofit kits make upgrades straightforward: remove the old trim, plug in the new LED module, and snap the integrated trim into place. No need to replace the entire can housing in most cases.
Spacing guidelines: divide ceiling height by two to get the spacing in feet. In an 8-foot-tall kitchen, place cans roughly 4 feet apart. Avoid installing them directly over the front edge of upper cabinets, that creates shadows on countertops. Instead, position cans 12 to 18 inches out from the wall to wash light down the cabinet face and onto the work surface.
Track lighting offers flexibility that recessed fixtures can’t match. Homeowners can reposition track light heads along the rail to spotlight specific zones, great for kitchens where the layout might change or where accent lighting needs fine-tuning. Modern track systems use sleek, low-profile rails in matte black, brushed nickel, or white finishes that blend into contemporary ceilings.
Track systems come in three main types:
- H-track (single-circuit): all heads operate together on one switch.
- J-track and L-track (two-circuit): allows independent control of different head groups, useful for separating task and accent lighting.
Installation typically involves mounting the track to a ceiling junction box with a compatible adapter, securing the rail with screws into ceiling joists or drywall anchors rated for the load, then clipping or twisting fixture heads into the track’s conductor channels. Some systems are plug-in: others require hardwiring. Check local codes, some jurisdictions have restrictions on track lighting near sinks due to NEC (National Electrical Code) wet-location requirements.
Smart Lighting Systems and Dimming Controls
Smart lighting brings modern kitchens into the connected home era. With voice commands, smartphone apps, or programmable schedules, homeowners can adjust brightness, color temperature, and even individual fixture zones without touching a switch.
Smart bulbs and fixtures communicate via Wi-Fi, Zigbee, or Z-Wave protocols. Brands like Philips Hue, LIFX, and Lutron Caséta integrate with Amazon Alexa, Google Assistant, and Apple HomeKit. Once configured, users can say “dim the kitchen lights to 30%” or “set kitchen to warm white” and watch the room transform. According to Digital Trends, many 2026 smart lighting systems include adaptive features that adjust color temperature throughout the day, cooler, energizing light in the morning and warmer tones in the evening.
Full-scale lighting control systems offer even more capability, integrating kitchen lights with whole-home automation, occupancy sensors, and scene presets (“Cooking,” “Dining,” “Cleanup,” “Party Mode”). These systems typically require a central hub and professional installation if hardwired into wall switches and dimmers.
Dimmer switches are essential even in non-smart setups. LED-compatible dimmers prevent flickering and extend bulb life. Replace old rotary or toggle dimmers with modern slide or paddle dimmers rated for LED loads, look for packaging that specifies compatibility with the bulb type and minimum wattage. Installation is straightforward for anyone comfortable with basic wiring:
- Shut off power at the breaker and verify with a voltage tester.
- Remove the old switch and disconnect wires.
- Connect the new dimmer’s wires (typically black to hot, white to neutral if required, green to ground).
- Secure the dimmer in the box, attach the faceplate, and restore power.
Important: Not all LED fixtures are dimmable. Check the product spec sheet before buying. Trying to dim a non-dimmable LED causes buzzing, flickering, or premature failure. When in doubt, test a single bulb or fixture before committing to a full kitchen retrofit.
Conclusion
Modern kitchen lighting isn’t a one-size-fits-all proposition. It’s about layering ambient, task, and accent sources to match how someone actually uses the space. Statement pendants add personality, under-cabinet LEDs eliminate shadows, recessed and track fixtures keep sightlines clean, and smart controls let homeowners adapt lighting on the fly. Start with one or two upgrades, swapping a dated fixture, adding LED strips, then build out the system over time. The result is a kitchen that looks better, works harder, and feels like the heart of the home it’s meant to be.


