
Good kitchen lighting isn’t just about seeing what you’re chopping, it’s about creating a workspace that’s safe, functional, and pleasant to be in. Wall lighting fills the gaps that overhead fixtures can’t reach, eliminates shadows over prep areas, and adds visual interest to what’s often the most-used room in the house. Whether you’re retrofitting an older kitchen or adding finishing touches to a remodel, wall-mounted fixtures offer flexibility that recessed cans and pendant lights can’t match. They’re also more forgiving to install than a full electrical overhaul, making them a solid entry point for DIYers ready to upgrade their lighting game.
Table of Contents
ToggleKey Takeaways
- Kitchen wall lighting eliminates shadows on prep areas and adds both safety and visual interest to your workspace by providing targeted illumination where overhead fixtures fall short.
- Proper placement—such as flanking sinks at 30–36 inches apart and spacing wall lights 4–5 feet along counters—is critical to eliminating shadows without creating glare.
- Aim for 50–75 lumens per square foot and use 3000K (soft white) color temperature for the best balance of task visibility and comfort in most kitchens.
- Most kitchen wall lighting installations require hardwired connections with proper electrical boxes, NEC compliance, and GFCI protection within 6 feet of water sources; hire a licensed electrician if you’re inexperienced with household wiring.
- LED strips and puck lights under cabinets complement wall sconces by providing shadow-free illumination across countertops and are available in plug-in or hardwired versions for flexibility.
- Dimmable LED bulbs paired with compatible dimmer switches give you flexibility to adjust brightness and blend multiple color temperatures for both functional task areas and ambient dining zones.
Why Kitchen Wall Lighting Matters
Kitchens demand layered lighting. A single overhead fixture creates harsh shadows across countertops and leaves corners dim. Wall lighting addresses this by delivering targeted illumination where you need it most, near the sink, along prep zones, or flanking open shelving.
From a safety standpoint, better visibility reduces knife accidents and burns. From a design perspective, wall fixtures add depth and dimension. They can highlight backsplash tile, frame cabinetry, or provide ambient glow during late-night snack runs without blasting the whole room with light.
Wall-mounted fixtures also solve practical problems in kitchens with low ceilings or layouts that don’t support pendant lights. They keep the visual plane open while still delivering lumens where they count. If you’re working with a galley kitchen or a space with limited ceiling access, wall lighting isn’t just helpful, it’s often the best move.
Types of Kitchen Wall Lighting Fixtures
Sconces and Wall-Mounted Lamps
Sconces are the workhorses of kitchen wall lighting. They mount directly to the wall via a standard electrical box and come in styles ranging from industrial cage designs to sleek, minimalist discs. Swing-arm sconces are especially useful in kitchens, they adjust to direct light exactly where you need it, then tuck back against the wall when you’re done.
When selecting sconces, pay attention to shade direction. Upward-facing shades bounce light off the ceiling for ambient glow, which is great near dining areas or breakfast nooks. Downward or outward-facing shades throw light onto countertops and are better suited to task zones. Glass or open shades provide more light output but show bulbs directly, so choose LED bulbs with a warm filament look if aesthetics matter.
Most sconces require hardwired installation, meaning you’ll need access to an existing junction box or be ready to run new wiring. If you’re renting or want to avoid cutting into drywall, plug-in sconces with cord management kits are an option, just be realistic about visible cords.
Under-Cabinet and Task Lighting
Under-cabinet lighting isn’t technically wall-mounted, but it occupies the same functional zone and often supplements wall fixtures. LED strip lights and puck lights install along the underside of upper cabinets, washing light down onto counters and backsplashes.
LED strips are thin, energy-efficient, and available in plug-in or hardwired versions. They provide even, shadow-free illumination and are especially effective over long stretches of counter. Puck lights are compact discs that create pools of light, they work well for highlighting specific prep areas but can leave gaps if spacing isn’t dialed in.
For hardwired setups, under-cabinet lights tie into the same switch as your wall sconces or connect to a dedicated dimmer. Battery-powered versions exist but require regular recharging or replacement, which gets old fast in a high-use kitchen. If you’re installing new cabinetry, plan for low-voltage wiring during the build, it’s far easier than retrofitting later.
Best Placement Strategies for Kitchen Wall Lights
Placement makes or breaks kitchen wall lighting. The goal is to layer light sources so you eliminate shadows without creating glare or hot spots.
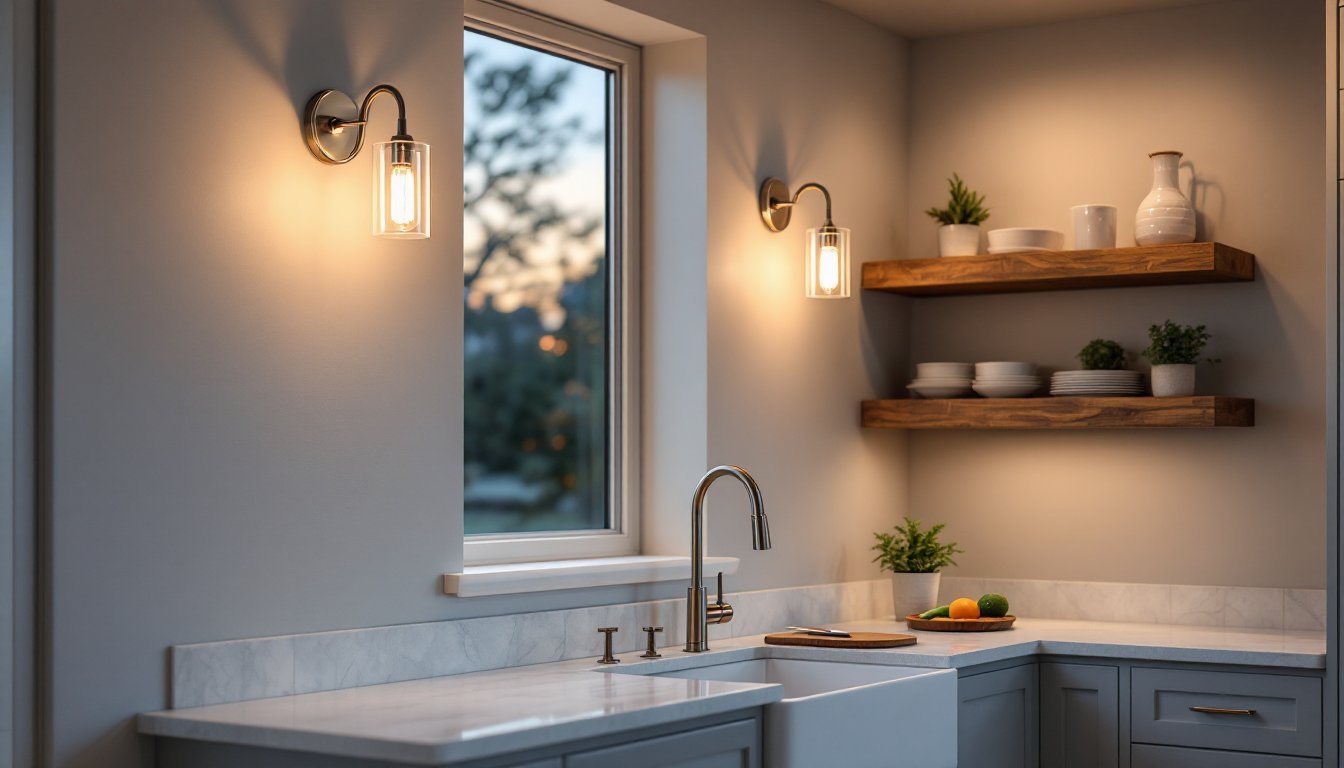
Flanking the sink: Mount sconces 30–36 inches apart, centered over the sink or slightly above eye level when standing. This setup mimics bathroom vanity lighting and eliminates the shadow your head casts when washing dishes or prepping food. If your sink sits under a window, consider flexible swing-arm task lights that can be angled away from glass glare during the day.
Along open shelving or above counters: Space wall lights every 4–5 feet to maintain even coverage. Mount them 12–18 inches above the counter surface, or 60–66 inches from the floor if you’re lighting open shelves. This keeps light directed onto work surfaces rather than shining directly into your eyes.
Near range or cooktop: Avoid placing any fixture directly above or within 3 feet of a gas range due to heat and grease exposure. For electric cooktops, keep fixtures at least 18 inches to the side. If you want task lighting in this zone, a dedicated range hood with built-in lighting is the safer call.
Accent lighting for design elements: Use wall lights to graze textured backsplashes, highlight artwork, or frame the perimeter of a breakfast nook. Place fixtures 6–12 inches away from the wall to create dramatic shadow play on stone or tile.
Always check your local building code before installing new electrical fixtures. Most jurisdictions require a permit for hardwired lighting, and kitchen circuits must meet NEC (National Electrical Code) requirements for GFCI protection if the fixture is within 6 feet of a water source.
Choosing the Right Brightness and Color Temperature
Kitchens need functional light levels, but not operating-room intensity. For general task lighting, aim for 50–75 lumens per square foot. A 100-square-foot kitchen needs roughly 5,000–7,500 lumens total, distributed across all fixtures.
Wall sconces typically house bulbs in the 40–60 watt equivalent (LED) range, delivering 450–800 lumens each. If you’re installing multiple fixtures, calculate total lumen output to avoid over-lighting. It’s easier to add a dimmer switch than to live with a kitchen that feels like a dental office.
Color temperature matters more than most DIYers realize. Measured in Kelvin (K), it affects how food, finishes, and faces look under your lighting. 2700K (warm white) feels cozy and works well for ambient or dining areas, but can make task work feel dim. 3000K (soft white) is the sweet spot for most kitchens, it’s neutral enough for food prep without the sterile edge of higher temps. 4000K (cool white) and above skew blue and are better suited to garages or workshops.
For flexibility, install dimmable LED bulbs and pair them with a compatible dimmer switch. Not all LEDs dim smoothly, so check the bulb packaging for “dimmable” labeling and match it to an LED-rated dimmer. Standard incandescent dimmers will cause flickering or buzzing.
The ideal ambient balance blends multiple color temps, warmer for social zones, cooler for prep surfaces. If you’re mixing fixture types, keep color temps within 500K of each other to avoid a disjointed look.
Installation Tips for DIY Homeowners
Installing hardwired wall sconces is a straightforward electrical project if you’re comfortable working with household wiring. If you’ve never opened a junction box, hire a licensed electrician, kitchens involve water, and mistakes can be dangerous or costly.
Tools and materials you’ll need:
- Voltage tester (non-contact type)
- Wire strippers
- Screwdriver set (flathead and Phillips)
- Drywall saw (if cutting new boxes)
- Electrical boxes rated for fixture weight
- Wire nuts (size 72B or 73B for 14–12 AWG wire)
- Mounting hardware (usually included with fixture)
Step-by-step installation:
- Turn off power at the breaker panel. Use a voltage tester to confirm the circuit is dead before touching any wires.
- Mount the electrical box if one isn’t already present. Standard remodel boxes (“old-work” boxes) clamp into drywall without cutting studs. Position the box 60–66 inches from the floor for sconces, or at the height that suits your fixture and layout.
- Run cable from the nearest power source (often an existing switch or outlet) to the new box. Use 14/2 or 12/2 NM cable (Romex) depending on circuit amperage. Secure cable every 4½ feet and within 12 inches of boxes per NEC code.
- Connect fixture wires. Most sconces have three wires: black (hot), white (neutral), and green or bare copper (ground). Match them to the corresponding house wires using wire nuts. If your house wiring lacks a ground, consult an electrician, modern fixtures require grounding for safety.
- Attach the fixture to the electrical box using the included mounting strap or screws. Tuck wires neatly into the box before tightening.
- Install bulbs and restore power. Test the fixture and check for flickering, buzzing, or heat buildup.
When to call a pro: If your kitchen lacks existing wall outlets or switches, or if you’re adding multiple fixtures on a new circuit, an electrician should handle the rough-in. Running new circuits requires a permit, and tying into your main panel isn’t a DIY task unless you’re trained. Many homeowners benefit from track lighting or plug-in options when hardwiring isn’t feasible.
Safety reminder: Always wear safety glasses when drilling overhead or cutting drywall, and use a dust mask if you’re working in older homes with potential lead paint. Keep a fire extinguisher rated for electrical fires (Class C) in the kitchen during any electrical work.
For design inspiration and real-world examples of what works, check out curated kitchen wall lighting ideas and reviews of current fixture options. Both can help you visualize placement and style before committing to hardware.
Wall lighting transforms a kitchen from merely functional to genuinely pleasant to work in. With the right fixtures, smart placement, and attention to code, it’s a project that delivers immediate, visible results, and one most confident DIYers can tackle over a weekend.


