
Deck steps in the dark are a recipe for twisted ankles and spilled drinks. Step lighting isn’t just about curb appeal, it’s about keeping guests (and yourself) upright when the sun goes down. In 2026, lighting options have never been more affordable or easier to install, from solar-powered kits to hardwired low-voltage systems. This guide walks through the types, installation process, and design strategies that actually work. Whether you’re adding lights to a new build or retrofitting an existing deck, the right approach depends on your deck material, local codes, and how much wiring you’re willing to tackle.
Table of Contents
ToggleKey Takeaways
- Deck step lighting prevents trips and falls while enhancing visual appeal, and is essential for safety and curb appeal when guests visit your outdoor spaces.
- Solar-powered step lights offer the easiest DIY installation with no wiring required, but perform best in sunny locations and require battery replacements every 2-3 years.
- Low-voltage LED step lighting systems are brighter and more reliable than solar options, typically running on 12V or 24V power with minimal permits required in most areas.
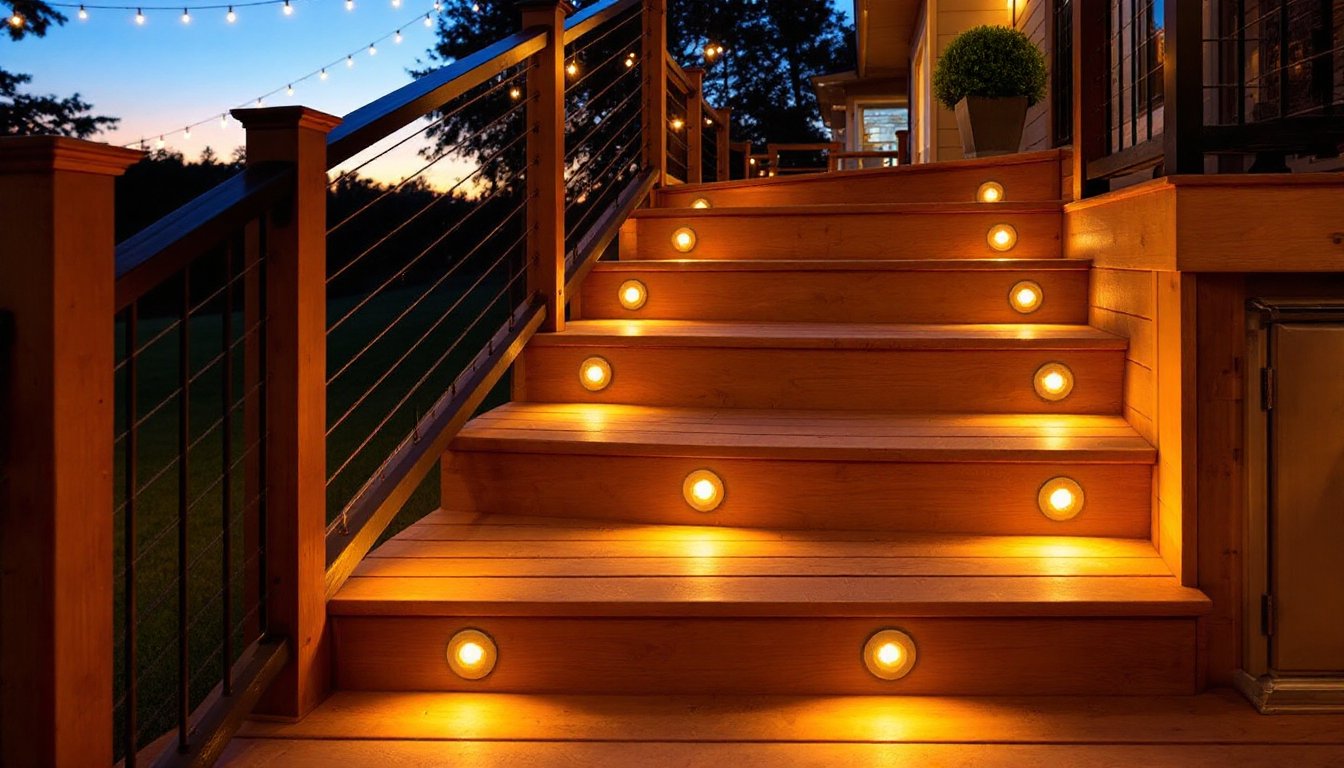
- Mount lights on stair risers rather than treads to reduce glare and prevent damage, using one light per step or two lights for wider staircases spaced 12-18 inches apart.
- Plan your fixture placement with consistent heights and spacing using a laser level, and hide wires under deck boards or inside railing posts for a clean, professional appearance.
- Pair step lights with layered lighting design, smart controls, and finishes matching your deck hardware to create both functional safety and attractive ambiance.
Why Deck Step Lighting Is Essential for Safety and Style
Step lighting serves two non-negotiable roles: it prevents trips and falls, and it defines the edges of your deck after dark. According to the International Residential Code (IRC), outdoor stairs require adequate illumination when they’re part of a primary exit route, though enforcement varies by jurisdiction. Even if your deck doesn’t technically require lighting, the liability risk from a guest injury makes it worth the investment.
From a design perspective, step lights add visual rhythm and depth. They guide the eye down stairways and can highlight deck architecture, railing posts, skirting, or planters, without flooding the space with overhead glare. Warm white LEDs (2700-3000K) create an inviting glow, while cooler temperatures (4000K+) work better for task-focused areas.
Step lights also reduce the need for bright floodlights, which can annoy neighbors and attract insects. Properly placed lighting keeps the focus low and directional, improving both safety and ambiance. If you’re selling your home, expect buyers to notice, outdoor lighting consistently ranks high on home inspection checklists and first-impression walkthroughs.
Types of Deck Step Lighting to Consider
Solar-Powered Step Lights
Solar step lights are the fastest install: no wiring, no transformer, no electrician. Each fixture includes a small photovoltaic panel that charges a built-in battery during the day and powers an LED at night. They’re ideal for composite or PVC decking where drilling and routing wires is a hassle.
The trade-off? Performance depends on sunlight exposure. If your deck sits under a pergola or dense tree cover, solar lights may stay dim or fail to charge fully. Most units produce 5-15 lumens per fixture, enough to mark a step edge but not to illuminate the entire tread. Battery life degrades over 2-3 years, so budget for replacements.
Look for models with replaceable NiMH or lithium batteries and IP65-rated housings to handle rain and snow. Mounting options include surface-mount (screw-on), post caps, and recessed kits that fit standard 2×6 or 2×4 stair stringers. The recessed style looks cleaner but requires a hole saw and careful sealing to prevent water intrusion.
Low-Voltage LED Step Lights
Low-voltage systems run on 12V or 24V DC power supplied by a transformer plugged into a standard 120V outlet. They’re brighter than solar (typically 20-50 lumens per fixture), more reliable, and offer better color consistency. Installation requires running outdoor-rated landscape wire (14 or 12 AWG) from the transformer to each light, but the wiring is safe to handle and doesn’t require a permit in most areas, just compliance with NEC Article 411 for low-voltage landscape lighting.
You’ll need to calculate total wattage and voltage drop. Most transformers max out at 100-300 watts: a typical LED step light draws 1-3 watts, so you can run 30-50 fixtures on a single transformer if wire runs are kept under 100 feet. Use a voltage drop calculator to avoid dim lights at the end of the line.
LED step lights come in surface-mount, recessed, and rail-mount styles. Recessed fixtures install flush with stair risers or treads and require a 3/4-inch to 1-1/4-inch bore. Rail-mount lights clip onto 2×4 or 2×6 cap rails and work well for metal or cable railing systems where drilling into posts isn’t practical. Stainless steel or marine-grade aluminum housings hold up best in coastal or high-humidity climates.
How to Install Deck Step Lighting (DIY Guide)
Tools and materials:
- Step light fixtures (solar or low-voltage)
- Transformer (for low-voltage systems)
- 12 or 14 AWG landscape wire
- Wire connectors (silicone-filled or twist-on with heat shrink)
- Drill with hole saw or spade bit (if recessed)
- Jigsaw or oscillating multi-tool (for tight cuts)
- Exterior-grade silicone caulk
- Wire staples or conduit clips
- Voltage tester
- Safety glasses and work gloves
Step-by-step for low-voltage installation:
-
Plan the circuit. Map out fixture locations, measure wire runs, and confirm total wattage doesn’t exceed transformer capacity. Place the transformer near a GFCI-protected outlet, ideally under an eave or in a weatherproof box.
-
Mount the transformer. Screw it to the house or deck framing at least 12 inches above grade. Plug it into the outlet but leave it off until wiring is complete.
-
Run the main wire. Staple or clip the landscape wire along deck joists, under stairs, or through the deck skirt. Avoid routing wire across sharp edges or where it can be pinched. If crossing a joist, drill a 1/2-inch hole and protect the wire with a grommet.
-
Install the fixtures. For recessed lights, drill the pilot hole in the stair riser (not the tread, water pools there). Drop the fixture into the hole, feed the wire through, and secure with the provided mounting clip or screws. Apply a bead of silicone around the rim to seal against moisture.
-
Make connections. Strip 1/2 inch of insulation from each wire end. Twist wires together (fixture to main line) and cap with silicone-filled connectors. Tug-test each connection. Many systems use quick-connect plugs, just push until you hear a click.
-
Test the system. Power on the transformer. Walk the circuit with a voltage tester to confirm each fixture is live. Adjust the timer or photocell settings if included.
-
Secure loose wire. Use staples every 18-24 inches along horizontal runs. Avoid overtightening, crushing the insulation can cause shorts.
For solar lights: Skip steps 1-3. Mark the mounting holes, drill pilot holes for screws, apply a dab of caulk under the fixture base, and screw into place. Orient the solar panel toward the south (northern hemisphere) for maximum charge.
Permit check: Low-voltage landscape lighting typically doesn’t require a permit, but if you’re tapping into an existing 120V circuit for the transformer, local codes may require inspection. When in doubt, call your local building department.
Choosing the Best Placement and Spacing for Step Lights
Riser-mount vs. tread-mount: Most pros recommend mounting lights in the riser (the vertical face of each step), not the tread. Riser placement illuminates the step edge and the tread below, reducing glare and keeping the light out of sightlines. Tread-mounted lights get stepped on, accumulate debris, and can create hotspots that temporarily blind users.
If your stairs have open risers (no vertical board), mount lights on the underside of the tread or on the stringer face.
Spacing and quantity: Install one light per step riser, centered or offset to one side. For wide staircases (48 inches or more), use two lights per step spaced 12-18 inches from each side. The goal is even coverage without creating harsh shadows or gaps.
For deck perimeters and landings, space lights 24-36 inches apart along the edge. This is close enough to define the boundary but far enough to avoid a runway effect.
Vertical alignment: Keep fixtures at a consistent height above each tread, typically 2-4 inches. Inconsistent placement looks sloppy and can confuse depth perception at night. Use a laser level or a story pole to mark drill points before you start boring holes.
Avoid light pollution: Aim fixtures downward or horizontally. Upward-facing lights create glare, attract bugs, and waste lumens. If local dark-sky ordinances apply, choose fixtures with hoods or shields that direct light downward only.
Top Design Tips for Deck Step Lighting
Match the finish to your hardware. If your deck uses stainless steel screws and cable railing, go with brushed stainless step lights. For a rustic composite deck with black aluminum posts, matte black fixtures blend in. Bronze and oil-rubbed finishes complement natural wood tones.
Layer your lighting. Step lights alone can feel stark. Pair them with track light heads for overhead zones, post cap lights on railing tops, or under-rail LED strips for ambient glow. Layering creates depth and lets you control intensity with separate switches or dimmers.
Use dimmers or smart controls. Many low-voltage transformers include built-in timers or photocells. Upgrading to a smart transformer (Wi-Fi or Zigbee compatible) lets you dim lights from your phone, set schedules, or integrate with voice assistants. Dimming also extends LED lifespan and reduces energy use.
Consider color temperature carefully. Warm white (2700-3000K) feels cozy and complements wood and earth tones. Neutral white (3500-4000K) works for modern metal and glass designs. Avoid mixing color temperatures in the same sightline, it looks disjointed.
Hide the wires. Route landscape wire under deck boards, inside hollow railing posts, or through conduit. Exposed wire stapled to the outside of a riser ruins the clean look. If you’re working with a finished deck, consider using surface conduit that matches your decking color.
Plan for maintenance. LEDs last 25,000-50,000 hours, but transformers, connectors, and solar batteries don’t. Use fixtures with replaceable LED modules or accessible housings so you’re not ripping out a fixture for a burnt diode. Label your wire runs and keep a circuit map with your home maintenance records.
Check compatibility with deck materials. Composite and PVC decking can crack if you drill too fast or use the wrong bit. Use a sharp spade or Forstner bit at low RPM, and back the hole with scrap wood to prevent blowout. For wood decking, seal the cut edge with exterior caulk or wood filler to block moisture.
For advanced techniques on integrating lighting into complex deck framing, Fine Homebuilding offers in-depth construction guides that go beyond basic DIY.


